
Hi!
Lots has been happening lately in my craft room. I was lucky enough to have my husband build a long L-Shaped desk, with part of it being a standing desk as a birthday gift. I’m still working to get my lighting set up perfectly, but have had a few questions on my setup and wanted to share what I have done so far! I’m also going to post a YouTube video soon of the before and after craft room tours, so please follow along if you’re interested in seeing more. If you’re interested in a video on camera or lighting just leave a comment and I’ll add it to the list of upcoming videos!
Lighting
For lighting, I started with a LOT of lighting and have been reducing it down to the right amount that doesn’t crowd the space. Here is info about what I’ve used:
- I started journaling recordings with a set of these softbox lights. They were on each side of my desk and pointed down at 45 degree angles to the area was equally lit. They provide amazing light, but they’re really large and cumbersome, so I’m working on eliminating these. Softbox lights are great about eliminating glare as you’re recording.

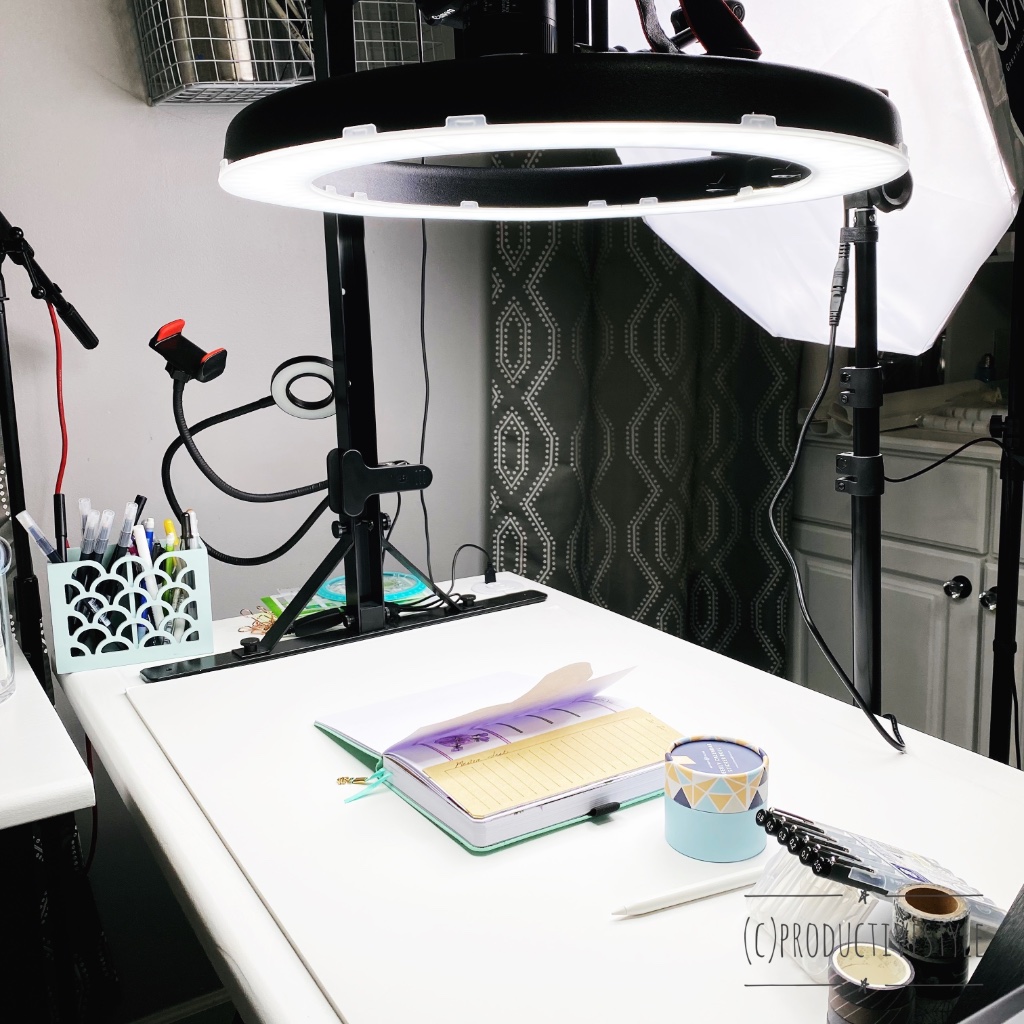
I just got this ring light from my Mom as a birthday gift and it is amazing! It will tilt down at a 90 degree angle and it’s large enough to go around my Canon T7i for recording. Since I have been filming on a whiteboard, I did find that it reflected a bit of light on the shiny surface, so I’m ordering this diffuser cover to help. I’ll let you know how it goes.


- In the photo above I’m also using this smaller softbox light. It is SOO bright, but it’s adjustable. The trick is getting it to be about the same brightness as the ring light (which is also adjustable), so the light washes over the surface evenly. It’s helpful to have two points of light and this also works great to pull aside and do some recording as I’m talking on camera (which I plan to start doing more now!).
Desk and Filming Area
My desk is custom built out of materials from Lowes and incorporates this standing desk. It is a great deal and glides very smoothly. I’d highly recommend it. It does not include memory for different settings, but it’s so easy to move, it’s not a big deal. For cord control, we mounted a power strip underneath the desk and it’s working great to keep everything together. If you’re interested in more details about how to build out the desk, let me know. I’ve found some great paint that works so well too.
- On top of the drawing portion of my desk, I usually use a frameless white board to film on. They are very cheaply available at hardware stores. Right now, I’m experimenting with some other materials including posters and foam boards. Hopefully the ring light cover I’ve ordered will fix the glare and I’ll get back to using the white board. It’s so easy to clean up if I spill anything or get ink on it. I’m constantly getting out of the lines with Tombow pens and then wiping it off for easy cleaning.
2. On top of the whiteboard I use a Glide Gear overhead mount. This one is amazing and has been working really well, but sells out pretty frequently. If you see it in stock and want to get it, don’t wait. It’s very sturdy and has made a huge difference in filming setup. No more tilted tripods!


3. One of the other items I like to have is a way to mount my phone for quick recording. I’ve attached this phone mount above with my Canon camera for filming so I can do quick videos in 16:9 format.


4. I also have this cheaper phone mount on the side of my overhead mount. It has a small ring light attached that can give warm or cool lighting, which is nice for a spotlight. I mostly use it to mount my phone to the side when I’m looking at a reference image on it. The mount on this one is a bit more wobbly, so I would not recommend it for filming.


Camera
For filming I use a combination of my iPhone (11 pro max) and my Canon T7i. I’m still learning all the Canon settings and working on getting better at recording for YouTube with it. I use a pretty versatile EF-S 18-55mm lens and use a power pack so I never have to charge batteries. It’s so helpful. I tend to record on these cards, which work great. The T7i does limit the length of recordings to 30 minutes, so if you’re doing long recordings you may have to plan a pause and restart so you don’t get cut off. It helps to set a timer if you think you’re going to go over the limit. Bonus: the alarm will help you sync audio up as you edit.
Audio
For audio, I use the Scarlett Studio microphone and mixer along with a basic mic stand and pop filter.
Let me know other questions you have! I’d love to help out more with future posts and videos!
P.S. Please note that this page has affiliate links. At no cost to you, a small portion of any products you purchase from these links will help support this page. Thank you so much!